


Transform Your Space: Creative DIY Wall Art Ideas to Elevate Any Room
Are your walls feeling a little bare or uninspired? The beauty of DIY wall art is that it allows you to express your creativity and add a personal touch to your home without breaking the bank. Not only does it enhance your decor, but it also creates a sense of warmth and personality in any room. From unique canvas paintings to innovative gallery walls, the options are truly limitless when it comes to transforming your space with DIY wall art. In this blog post, we'll explore the essential materials you need, share some creative ideas to spark your imagination, and provide a step-by-step guide to crafting your own stunning pieces. So, roll up your sleeves and let’s dive into the colorful world of DIY wall art!

TLDR (Key Takeaways)
- DIY wall art allows for personal expression and creativity in your space.
- Using essential materials can simplify the DIY wall art process.
- Unique DIY wall art ideas can transform a room's aesthetic and atmosphere.
- A step-by-step guide makes creating your own wall art accessible to everyone.
- Choosing the right style and placement enhances the impact of your wall art.
Introduction to DIY Wall Art and Its Benefits
Are you looking for a creative way to express your personality and enhance the aesthetics of your home? Enter DIY wall art—a fun and fulfilling project that allows you to add a personal touch to your décor. Not only does creating your own art foster a sense of accomplishment, but it also provides the perfect opportunity to customize your living space to reflect your style. From vibrant canvases to textured mixed media pieces, the possibilities are endless! Plus, engaging in DIY projects can be a therapeutic activity that brings joy and relaxation. Let’s explore the benefits of DIY wall art and how you can transform your blank walls into captivating focal points!
Essential Materials for DIY Wall Art Projects
When it comes to creating stunning and unique decor for your home, DIY wall art projects can add a personal touch that mass-produced items just can’t match. To get started, you’ll need to gather some essential materials that not only support your creativity but ensure a polished final product. Below are some must-have materials that every DIY enthusiast should consider:
1. Canvas or Wood Panels: These serve as the foundational surface for your artwork. Canvases come in various sizes and depths, while wood panels offer a more rustic, textured option.
2. Acrylic Paints or Watercolors: For vibrant colors and easy blending, acrylics are a go-to choice. Watercolors can lend a soft, dreamy quality to your pieces if you’re aiming for a more delicate aesthetic.
3. Paintbrushes and Sponges: Different brush sizes allow for varied techniques—from fine detail to broad strokes. Sponges can be useful for texture and layering effects.
4. Stencils and Templates: Use these for intricate designs and patterns. They help streamline the process and ensure precision, especially if you’re new to painting.
5. Adhesives and Fixatives: Depending on your project, you may need glue for collaging or a fixative spray to protect your finished piece from dust and UV damage.
6. Frames: Once your DIY wall art is complete, framing it can elevate its look significantly. Choose a frame that complements the style of your art as well as your home’s decor.
With these essential materials in hand, your journey into the world of DIY wall art can blossom into a fulfilling creative venture that adds character to your living spaces.
'Creativity is intelligence having fun.' - Albert Einstein
Creative Ideas for DIY Wall Art
When it comes to personalizing your living space, DIY wall art is an excellent way to showcase your creativity and style. Not only does it add character to your home, but it also allows you to express your individuality in a budget-friendly manner. Here are some engaging ideas to inspire your next project:
1. Framed Fabric Panels: Choose fabrics that resonate with your aesthetic—think vibrant African prints or soft pastels. Stretch them over wooden frames for an elegant, textured look. This quick project can elevate the mood of any room, adding warmth and colour.
2. Nature-Inspired Creations: Use dried leaves or flowers to create a stunning wall piece. Frame these natural elements in shadow boxes for a 3D effect that brings the outdoors inside, perfect for a serene home office or meditation space.
3. Geometric Shapes: Embrace modern design by cutting colorful paper or wood into geometric shapes. Arrange them in a dynamic pattern on your wall. This simple yet striking form of DIY wall art can serve as a vibrant focal point in your living area.
4. Photo Collages: Print your favourite memories and create a wall grid. This personalized touch tells your family’s story and makes for a delightful conversation starter.
5. Canvas Painting Projects: Grab some paint and brushes, and let your creativity flow! Abstract designs or simple landscapes can be fun to create and will make unique additions to your decor.
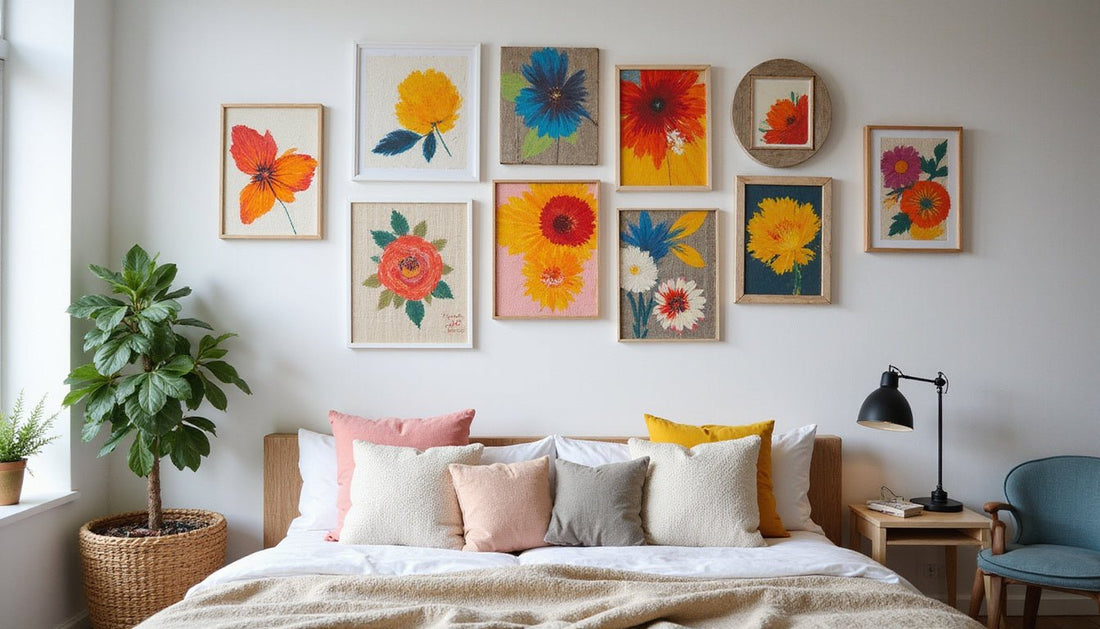
Styling Tip: For a polished finish, arrange your artworks in a salon-style gallery wall, mixing frames and sizes for an eclectic look that feels curated.

Step-by-Step Guide to Creating Your Own Wall Art
Creating your own wall art can be one of the most satisfying DIY projects, allowing you to infuse your personal style into your home decor. Here’s a step-by-step guide to help you craft beautiful DIY wall art that reflects your taste and complements your interior design.
Step 1: Gather Your Materials
Start by collecting your supplies. You will need:
• Canvas or wooden board: Choose a size that suits your space.
• Acrylic paints: Select colors that resonate with your existing decor.
• Brushes: Use a variety of sizes for different effects.
• Palette: For mixing colors.
• Additional supplies: Consider stencils, sponges, or even natural materials like leaves for texture.
Step 2: Choose Your Design
Before you start painting, think about what you want to create. Browse online for inspiration or sketch out a few ideas. Whether you aim for abstract shapes or a scene from nature, having a clear vision will guide your creativity.
Step 3: Prepare Your Canvas
If you’re using a wooden board, ensure it's sanded and ready for paint. For canvases, you can either leave them white for a modern look or paint the background in a solid color that matches your palette.
Step 4: Start Painting
Begin layering your colors, starting with the background. Use larger brushes for wide strokes and smaller ones for details. Experiment with dabbing techniques for texture. Remember, the beauty of DIY wall art is in the imperfections!
Step 5: Let It Dry and Display
Once your masterpiece is finished, allow it to dry thoroughly before hanging. Choose a spot in your home that needs a focal point or a pop of color. Consider pairing your DIY wall art with other decor items to create a cohesive look that enhances your interior styling.
By following these simple steps, you can create stunning DIY wall art that adds personality to any room. Get creative and don’t shy away from experimenting—each piece will be uniquely yours!
Tips for Choosing the Right Style and Placement
When it comes to adding a personal touch to your home, DIY wall art is a fantastic and budget-friendly option to consider. Choosing the right style of wall art and its placement can significantly enhance the overall aesthetic of your space. Here are some essential tips to guide you through the process:
1. Understand Your Space: Assess the wall you plan to decorate. Is it large and expansive, or is it small and cozy? A larger wall can handle bolder pieces or a gallery arrangement, while smaller walls often benefit from simple, solitary art pieces that won’t overwhelm the space.
2. Establish a Color Palette: Your wall art should complement the existing colors in your room. Choose hues that resonate with your furniture, accents, and overall decor style. For example, if your room features neutral tones, consider using vibrant colours in your DIY art to create an eye-catching focal point.
3. Mix and Match Styles: Don’t be afraid to blend different styles to create an eclectic and dynamic look. Combining abstract with realistic or traditional art with contemporary pieces can create visual interest and reflect your personality.
4. Think About Texture: Texture plays a vital role in making your wall art stand out. Incorporate different materials like canvas, wood, or even fabric to add depth. A textured piece can be especially striking against a smooth wall.
5. Placement Matters: Hang your art at eye level for the best impact, typically around 145-150 cm from the floor. If you’re creating a gallery wall, start with the most prominent piece in the center, then arrange other artworks around it, keeping varying sizes and shapes in mind.
By carefully considering these aspects, you can create a stunning display of DIY wall art that not only beautifies your home but also showcases your creativity.
Frequently Asked Questions
What are some benefits of creating DIY wall art?
Creating DIY wall art allows you to personalize your space, express your creativity, save money on store-bought art, and create unique pieces that reflect your style.
What essential materials do I need to get started on a DIY wall art project?
Basic materials include canvas, paint, brushes, glue, scissors, a variety of paper, or repurposed items such as wood or textiles, depending on the specific project.
Can you provide a simple creative idea for a DIY wall art project?
One simple idea is to create a geometric canvas art piece using painter's tape and different paint colors. Just tape off sections of a blank canvas, paint in the spaces, and remove the tape for a sleek, modern look.
What tips should I consider when choosing the right style for my DIY wall art?
Consider your existing decor and color scheme, the mood you want to create, and the size of your wall. Choose styles and colors that complement your furnishings and make a bold statement or create a calm atmosphere.
How can I effectively place my DIY wall art in a room?
When placing your DIY wall art, consider the height (eye level is typically best), group similar pieces together, and balance larger pieces with smaller ones. You can also create a gallery wall for an eclectic look.


